Coffee Filter Crafts: Jellyfish

DSC_0106-001

If your kids had fun making the coffee filter seahorse craft, they will certainly enjoy adding these jellyfish to their art aquarium.  They are made with the same technique of washable markers and water and have long tentacles that sway in the breeze.

The topic of jellyfish made an engaging subject in our ocean animals unit study.  As with the seahorses, we borrowed some books from the library to begin our quest for information on these magnificent creatures. (Jellyfish by Louis Spilsbury, Box Jellyfish: Killer Tentacles by Natalie Lunis, and Portuguese Man-of-War: Floating Misery by Natalie Lunis.)  We followed these books up with some videos on YouTube so that we could actually see jellyfish in action.

Here are ten things you may not have known about jellyfish before:

1.  A jellyfish does not have a brain.

2.  Jellyfish come in all sorts of colors: pink, blue, red, even multi-colored.

3.  A jellyfish’s body consists of a polyp, or float, on top and many tentacles dangling below.  The mouth is underneath the polyp.

4.  A jellyfish’s tentacles are filled with toxins used to hurt or paralyze their prey, which can be little fish, other jellyfish, crabs, and plankton.

5.  A group of jellyfish is called a bloom, a swarm, or a smack.

6.  Some jellyfish can glow in the dark.

7.  Jellyfish are a favorite snack of sea turtles.

8.  The Portuguese Man-of-War is not actually a jellyfish.  It is a group of organisms that live together and function together as a whole.

9.  Most jellyfish have a life-span of a few hours to a few months.

10.  Jellyfish range in size from very tiny (thumbnail size) to very large (whale size).

Now, let’s make some coffee filter jellyfish.

You will need: 2 coffee filters, washable markers, water, a paintbrush, a paper plate,  plastic grocery bags, a stapler, party streamers, and some tape

DSC_0107

First, lay your coffee filters one on top of another on the paper plate. Color dots and swirls and scribbles however you like (just like we did when we made the seahorse) on the top coffee filter with the washable markers.  Then, with the coffee filters still stacked up on top of each other, paint over the top filter with water until the colors are swirled to your satisfaction.

DSC_0109

When the coffee filters are dry, staple the outer edges together as shown, leaving a small opening on one side.  Insert the plastic grocery bags into the opening until the polyp is nice and full and then staple shut.

DSC_0106

Next, cut varying lengths of your party streamers and tape to the bottom of your coffee filter polyp.  (I found a couple of rolls of blue and yellow in the junk drawer, so blue and yellow it was for us!)  Use fishing line or thread to hang your jellyfish from the ceiling.

For a short while, we hung our jellyfish in the entrance of our dining room.  They added a beautiful pop of color and a touch of movement to the area, but they were too distracting when you had to walk underneath them.  We ended up moving our jellyfish to a safer location in a corner of the dining room instead.

Get creative!  Think another material besides party streamers would work for the tentacles?  Try it and see!  As with many other ocean animals, the different types of jellyfish vary widely in shape, size, colors, textures, and even the way they move.

And while you are creating your jellyfish masterpiece, you may want to try reading aloud Jeremiah Jellyfish Flies High by John Fardell.  It’s a funny picture book for the kindergarten set but will be sure to entertain the older kids as well.


Coffee Filter Crafts: Seahorses

DSC_0114-001

This year in science, we have been studying ocean animals.  We have checked out library books on sharks, watched videos about octopuses, studied the starfish, and really have enjoyed investigating in depth the many creatures of our oceans.  The kids are making ocean animal notebooks to go along with our study, but I have also tried to incorporate arts and crafts into our unit study as often as I can.  Doing something creative with your hands helps solidify learning and makes it more fun, especially for the hands-on learners.

A while ago we examined the lives and characteristics of seahorses.  We borrowed some books from the library (Seahorses and Sea Dragons by Mary Jo Rhodes and Seahorses:Everything About History, Care, Nutrition, Handling, and Behavior by Frank Indiviglio) and learned amazing things about these fascinating creatures.  We found that YouTube has some great educational videos on seahorses as well:

So what did we learn?  Here are ten facts about these little equine-looking sea creatures.

1.  Seahorses have the ability to change color and sometimes even their texture to blend into their surroundings, such as seaweed, various types of coral, and sea anemones.

2.  Seahorses are monogamous, mostly because they cannot swim very well, making it difficult enough to find one partner in life.

3.  Seahorses greet their partners every day with an elaborate dance and an intertwining of their tails before they venture off to find food.

4.  Seahorses have prehensile tails just like monkeys do, which means they can use them to grab onto coral or another seahorse.

5.  Seahorses have few enemies because they are too bony and too hard to eat, but often crabs are willing to try.

6.  Seahorses eat plankton, tiny fish, and small crustaceans by sucking them through their snouts like a vacuum cleaner. They have to eat constantly or they will die.

7.  Seahorses are the only animal species in which the male is the one that gives birth to their young.

8.  Seahorse swim upright.

9.  Seahorses are actually fish, as they breathe with gills, have some fins, and use a swim bladder to float.

10.  Seahorses can measure anywhere from less than an inch to more than fourteen inches long.

And now that we know a little about seahorses, let’s gather a few supplies to make a coffee filter seahorse.

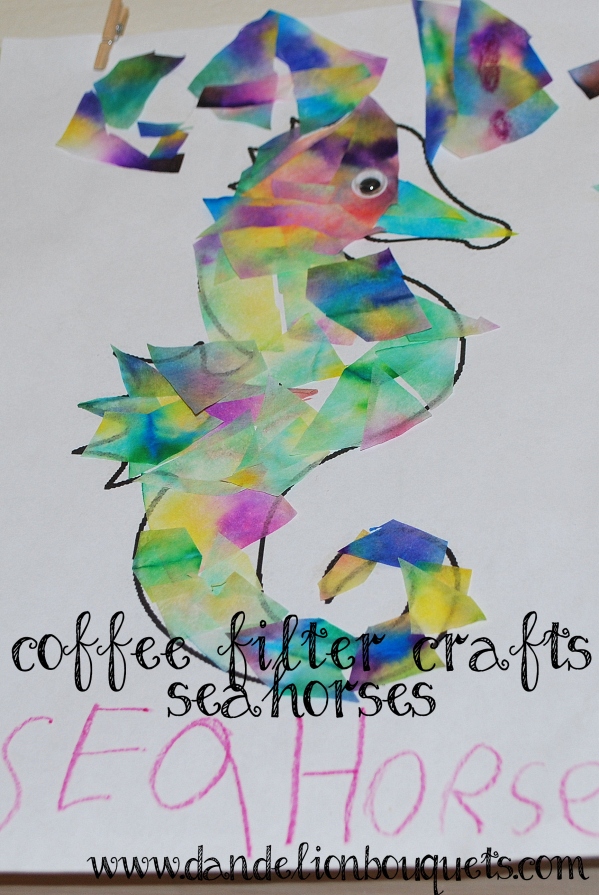
You will need:  a coffee filter, washable markers in bright colors, a paintbrush, water, a paper plate, a googly eye, scissors, a glue stick, and a seahorse template such as this one

DSC_0110

First, flatten the coffee filter on top of the paper plate.  Have your child draw all over the coffee filter with the washable markers.  Big circles of color work the best.

DSC_0114

Next, give your child some water and a paint brush and let them thoroughly paint over the coffee filter.  It’s okay if they use too much water as it will dry. (eventually!)Lay the coffee filter and plate in a warm place to dry.  (I put ours on top of our dryer!)

DSC_0119

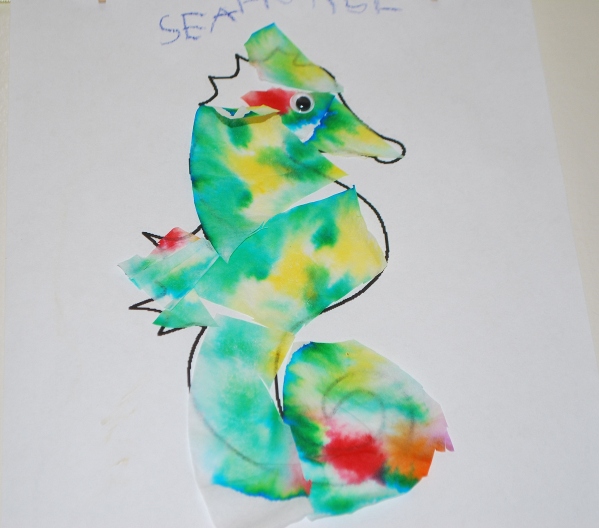
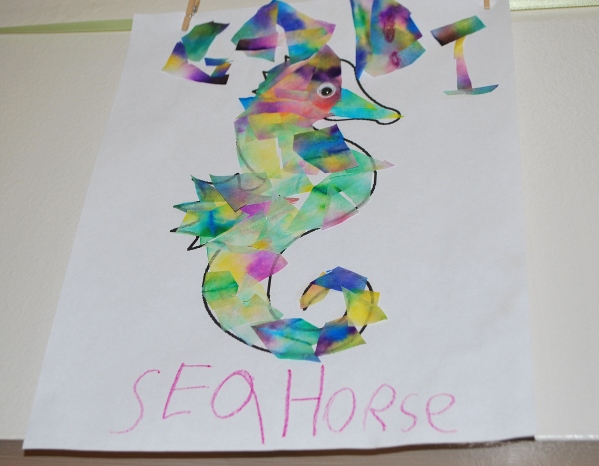
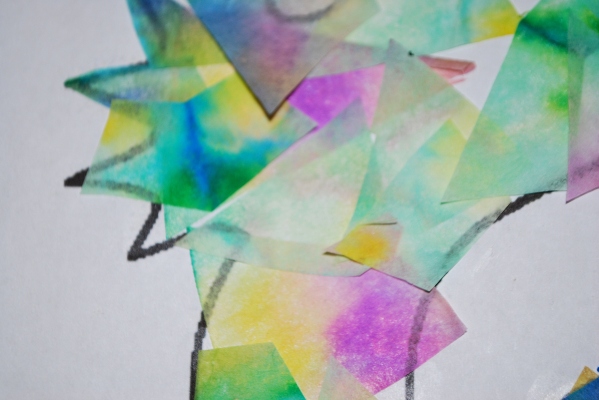
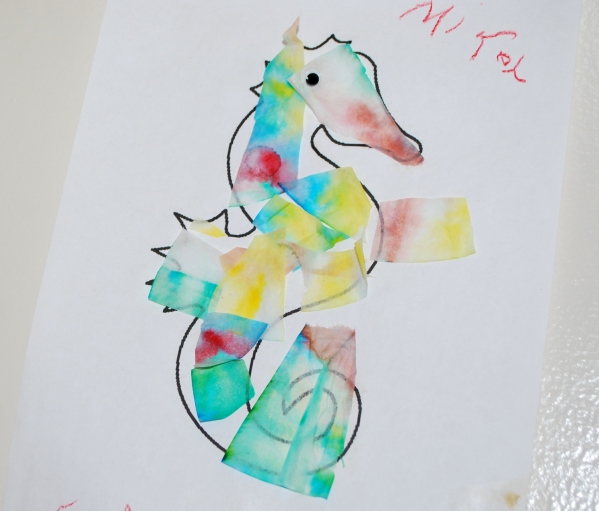
Once the filter is dry, show your child how to cut it up into small triangles and squares.  Then, instruct them to glue them to their seahorse page, overlapping them like the bony fins of a seahorse and covering the entire animal’s body.  More overlap will produce a prettier effect.

DSC_0116

Finally, glue on a googly eye and hang the completed art in a conspicuous spot for all to admire.

I think the results of this craft are very Eric Carle-like.  In fact, he has written a cute book called Mister Seahorse that features bright watercolor seahorses in the illustrations. That might be a fun read-aloud while the kids are doing this craft.

Art-Themed Dinner Party

DSC_0062DSC_0079

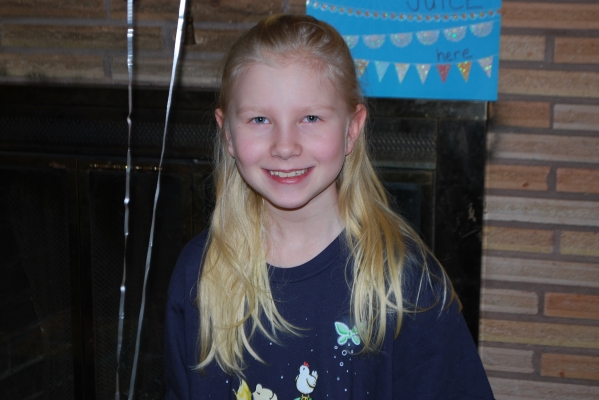
Our family rule of only having a party on the odd-numbered birthdays have served us well in that I only have to plan and execute two birthday parties in a calendar year.  However, Hosanna’s birthday happens to fall at the end of the year while her sister Gabi’s comes right in the first month of the next year.  This means that I had to plan two birthday parties in two consecutive months, not to mention Christmas parties and New Year’s festivities.  Also, take a good look at that gorgeous girl in the photo.  She’s not really turning nine tomorrow, is she?  It’s getting a little ridiculous, this whole getting older thing.  If I could freeze time for just a little while, I’d do it now while she’s at this dreamy age of becoming a young woman and still being a little girl all at once.

Anyway, Gabi has had her birthday party theme picked since last year.  Given her proclivity for crafting and drawing and sewing and doodling, it was no surprise that she wanted an art party.  She and I sat down a few months ago to make a Pinterest board and fill it with ideas for the party, as I do for every party.  We quickly found an overwhelming number of ideas on decorations for the party.  Of course, Gabi had her own ideas, too.  She wanted a dinner party so she could have her favorite food at the party – spaghetti.

So here’s how we threw our own art-themed dinner party, in case you ever want to do the same.  We began by sending out invitations via evite – this is the one we used.  Then we got started on making the decorations.  I definitely enlisted Gabi’s help on these, and she was happy to oblige.

DSC_0073

We made this welcome wreath for the door using a foam wreath form from the dollar store, coffee filters, paint, and a little construction paper.  The idea for this wreath came from Ramblings from the Sunshine State.

DSC_0064 DSC_0067 DSC_0065

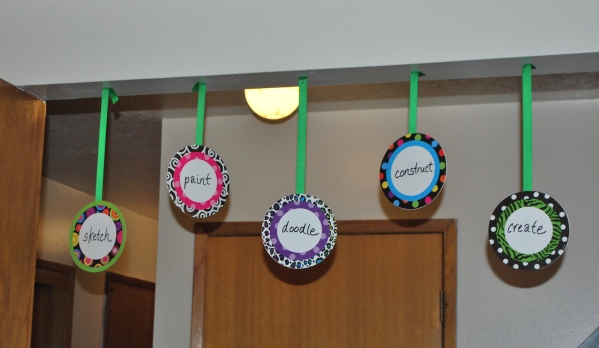
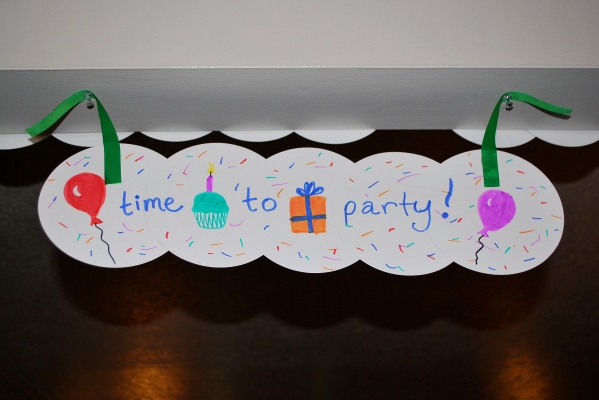
I was at our local learning store a few weeks ago when I saw these colorful circle cut-outs in the clearance bin.  I immediately knew we could find a way to incorporate them into the party decorations.  I ended up writing “Happy Birthday, Gabi!” on some of them.  I overlapped the circles and glued them with hot glue and then hung them up as banners.  Since the “Gabi!” one was hanging in the doorway, I decorated the back of it with party images so it wouldn’t be a blank white blob. 🙂  I took the rest of the circles and glued them back-to-back, with a ribbon stuck in between.  I wrote art inspiration words such as create and design on each side of the circles and hung them in the other doorway leading to the living room.

DSC_0061

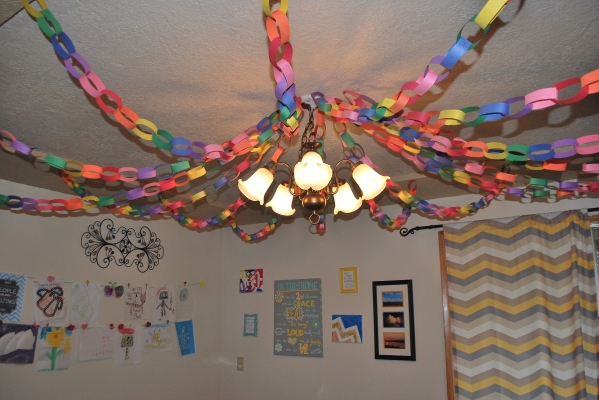
The paper chains in the dining room were all Gabi’s idea.  I bought two packs of construction paper and settled down on Friday night to cut out inch-wide strips and staple them all together.  This was a VERY time-consuming project – let’s just say that I was glad that I had started a couple of nights early and that I had a few seasons of Big Bang Theory to watch.  Also, they turned out well, and the impact on the room was amazing.

DSC_0084

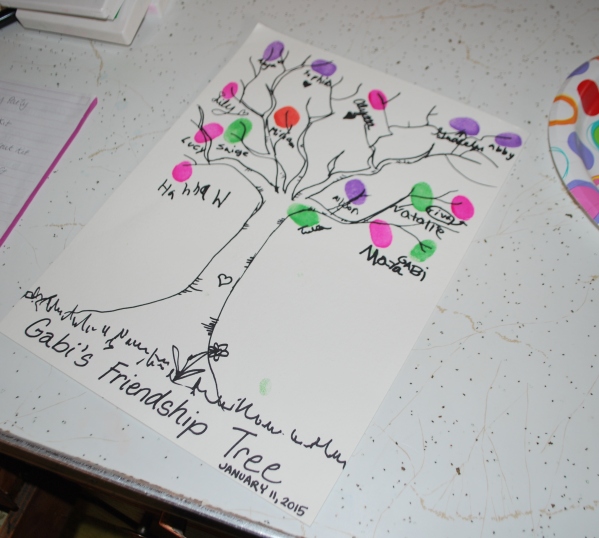
We used the leftover paper strips to wrap around water bottles for our guests, which turned out to be fifteen girls in all.  The girls all arrived, giggling and quite excited, at four’o’clock.  After they ditched their coats and shoes in Gabi’s room, they came out to “sign the guestbook.”  I made a Friendship Tree on thick card stock, and the girls signed it with their thumbprints.

DSC_0018-001


It turned out so cute and will be a nice keepsake from the party.  The party guests next went to the dining room to do the art project we had planned.

DSC_0070 DSC_0066

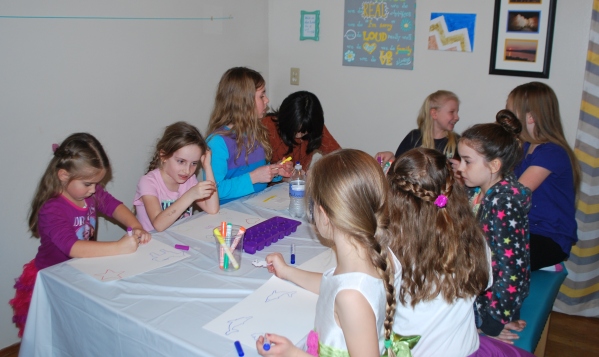
I had two tables set up for the project – they were covered in two plastic tablecloths and were geared with washable markers, watercolor paper, paint brushes, and plastic ice cube trays filled with water.  Then I showed the girls the sample project I had made earlier and explained how to make their own tie-dye watercolor painting.  I had a small table full of various die-cuts that the girls could choose from to use as stencils in their project.  They traced the die-cuts with washable markers and then colored around the objects in various patterns with the markers.  Then they painted over the marker with water to get the watercolor effect. (like the method I used in the watercolor snowflake art).

DSC_0086

DSC_0085


When they finished, I hung up their art on my art display wall to dry while the girls ran giggling into the living room to play some board games.  I peeled off the top table cloth from each table and got them ready for dinner.  I was privileged to have my best friend come to help with the dinner prep at the party.  She and another mom (thanks girls!) prepared three kinds of pasta, marinara sauce, melted butter, cooked ground beef, and cheese so that each party guest could design her own pasta dish.  This was Gabi’s dream come true, and it worked particularly well since we had quite a few party guests that could not have gluten.  We simply had a gluten-free pasta option and made sure the sauce was gluten-free as well so everyone could have something.  DSC_0092

For dessert, Gabi picked something simple – vanilla cupcakes.  I found some tall sparkler candles at a local party store to stick in the cupcakes along with tiny paper flags.  The party guests were delighted that each one of them had a sparkling candle to blow out after we all sang “Happy Birthday” to the birthday girl.

DSC_0098

Of course, right after the cupcake eating, we had to have present time.  I have never seen such an excited group of girls eager to give their gifts and show off the cards they had made for Gabi.  She got all sorts of craft kits and books and fun things to do.  We are up to our ears in washi tape and pillow making and little craft pieces and I love it!  By the time we got through all the presents, it was almost time for kid pick-up.  I pulled out a bunch of art supplies and sent the girls back to the tables to be creative while they waited for their parents.

It was fantastically fun although I would say that having sixteen pre-teen girls in your house is not for the faint of heart!  Gabi was thrilled with it and really that is all that matters.

And hey, we have some colorful paper chains to cheer up the house for a while and get us through these dreary winter months!


Watercolor Snowflakes

DSC_0067

I always get immersed in my arts and crafts at this time of the year.  Whether finishing up a flurry of presents for Christmas or settling in to watch a movie while I crochet, the urge to create and actually finish projects is strong.

Recently, a dear friend turned forty, and I wanted to make something special for her to commemorate the occasion.  I remembered a little watercolor craft I had done with my Passport to Adventure home school co-op class in which we made colorful peacocks by coloring coffee filters with washable markers and then painting them with water.  I thought the technique could easily be replicated on canvas.  Since I was in the midst of planning an Olaf/Frozen themed birthday party for the youngest, I had been busy cutting out a myriad of paper snowflakes.  And thus the idea of making watercolor snowflakes on canvas was born.  It was simple and took very little time to do.  Here’s the how-to to make your very own watercolor snowflakes.

You will need:  an artist canvas (or a nice stiff sheet of watercolor paper), a blue washable marker, paper, scissors, a glue stick, a paintbrush, and water. Optional things that I used to finish off my paint were acrylic paints (gray and black) for the lettering, clear glitter glue, and sealer to protect it.

DSC_0052

First, you will want to cut out some snowflakes out of your paper.  Mine were about three inches in diameter, and I kept them simple since I wasn’t sure how this whole thing was going to work.  You can definitely use some more complicated ones if you like.  Arrange the snowflakes in a design that looks pleasing to the eye on your canvas.  On my rectangular canvas, I had three snowflakes arranged in the top right corner and three in the lower left corner.  Glue the snowflakes to the canvas with the glue stick.  Now comes the fun part. Using the blue washable marker (it must be washable – no sharpies!), carefully trace the snowflakes onto the canvas, including any small detail parts in the center of the snowflakes.  Then scribble all over the rest of the canvas with the blue marker.  Do not worry about covering the canvas thoroughly with marker.  Next, carefully remove the paper snowflakes from the canvas.  You can see in the photo above that I had already removed two of the snowflakes.

DSC_0055

Time to paint!  With your paint brush and a cup of water, start painting any area that has marker strokes on it.  I used a small paintbrush around the perimeter of the snowflakes and for the center details, and a larger one for the rest of the canvas.  Replenish your brush with water frequently but do not get it too wet.  Otherwise, you will have puddles on the canvas.

DSC_0056

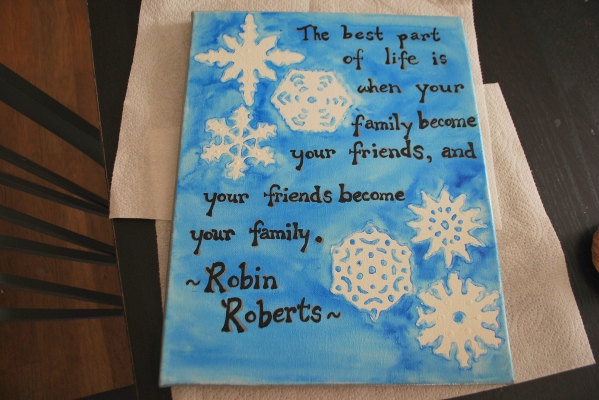
When the whole canvas is various shades of blue, set it on a counter top or table to dry completely.  When it is dry, you are ready to finish your snowflake painting however you like.  I took some clear glitter glue and outlined the snowflakes to make them a little more sparkly.  Then I used some acrylic paints to add a favorite quote to the canvas.  When the whole canvas was dry to the touch, I sealed it with matte acrylic sealer to protect it.

DSC_0066

DSC_0067

I think it turned out lovely, and it only took a couple of hours from start to finish. This technique could easily be used with other shapes, too.  My oldest will be having an art party in a few weeks, and I think I will try using this marker/watercolor method for the girls to make tie-dye paintings.

Happy crafting!